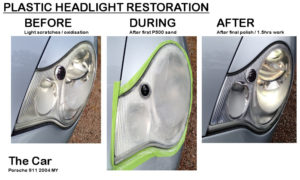
Do your head lights look misty, scratched or chipped with yellow oxidisation?
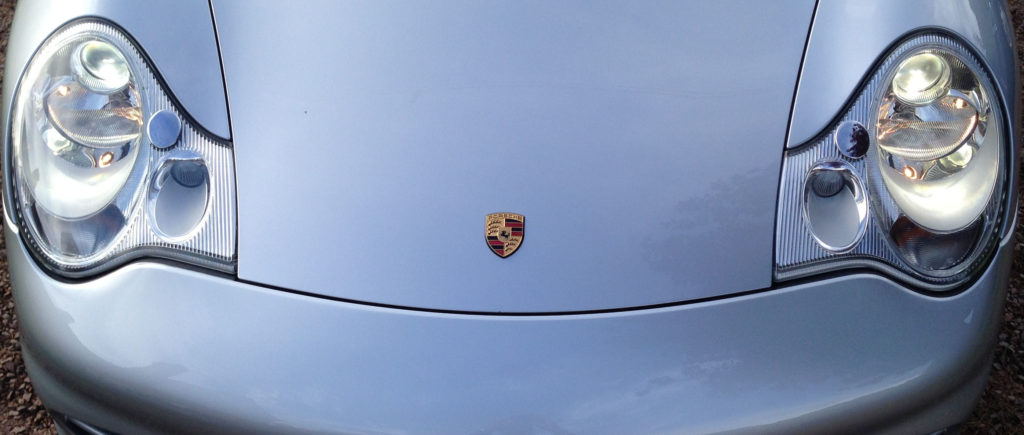
If they do then I”ve got some help and advice that will get them looking like new again!
So more and more car manufacturers these days are fitting plastic headlights to their cars and vans. This is due to a variety of reasons, i.e. it”s easier to form weird and wonderful shapes out of plastic than glass, so is a versatile product to modern design and is also a lot lighter too – very important for performance cars and for squeezing as much MPG as possible.
So there are clear benefits to using plastic (acrylic / polycarbonate) in terms of design and weight, however, plastic is of course not as hardy as glass and is more susceptible to scratching, chipping, yellowing and oxidisation that make them look cloudy and hazy in the worst of cases.
Over the last ten years of so, most manufacturers have migrated to using plastic headlights including Porsche, Mercedes, Jaguar, Volkswagen and Audi.
The good news is that the lifespan of these types of head lights are quite long and will still look fresh after five or so years. However, for cars around or over ten years old then they are now starting to show signs of wear and tear and look quite shabby. On most day-to-day cars it”s not really a problem unless the damage is impacting the strength of the light passing through the lens – I have seen some really bad examples that must be a nightmare to drive at night time and are dangerous. On more prestigious marks like the Porsche 911 you”ll want the headlight lenses looking their very best even if it”s not causing a problem.
So what are the options for plastic headlight restoration?
Well it really depends on how bad they are and what type of damage has been caused. For example, if they are just lightly scratched then a simple mild cutting paste like T-Cut metallic might be the ticket with some medium elbow grease. Meguiars also have a compound paste for use on headlights for around £20, however, in my opinion you may as well give a cheaper cutting paste a go using a polishing pad on a household drill. Here”s a link to the Meguiars site if you want to know more – click here
If the lenses are badly damaged including oxidisation, deeper scratches and small stone chips then they may need to be professionally restored. If you would like contact details of a local professional headlight restorer then please get in touch and I”ll help you out – it costs around £80 which is very cheap when you consider the amount of work and the potentially costly repair if you get it wrong! Also, all the materials are included which if you did it yourself then in the case of the 3M kit it will usually cost you about £20 alone.
However, if you have a few hours spare, are the “handy” type and brave then you could do it yourself.
How to restore plastic headlight lenses yourself with the 3M Head Light Restoration Kit
So if you are going to atempt the job yourself then I recommend you use the 3M headlight restoration kit (see here) – in addition to this you”ll need a few other things: a household powerdrill, electric extension lead; dry area to work and about 2-3 hours.
Here are the steps to work though – don”t rush it, take your time and read all the 3M instructions.
 Wash the head lights and dry
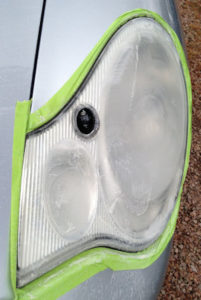
- Mask the area around the lenses so when you come to the sanding process you don”t scratch the paint work / rubbers
- Attatch the sanding mount to the drill and place the P500 grit pad to the vecro mount
- Start sanding the lenses applying gentle pressure with light circular motions – keep the drill moving at all times
- Continue sanding until all the deep scratches / oxidation is removed and the lenses are completly sanded – you may have to change the pad a few times as they wear out (you won”t be able to see thorugh the lenses at this point but don”t panic – they will look amazing by the end of this process)
- Now work your way down the grit pads moving to P800 grit and P1000
- When you are happy all the deeper scratches / oxidation is removed then attach the P3000 foam disc and use with a light spray of water from time to time – don”t let it run dry
- Lastly attach the polishing foam tool and put a pea size blob of polishing compound in the middle. Rub this over the lens before starting the drill. Once worked into the lens then switch the drill on and work gently around the head light
- Repeat the previous step as many times as required until the lens looks clear and you are happy with the finish
To protect them further I recommend you finish the job by applying a bodywork polish like Auto Glym – just for added protection.
That”s it – now stand back and admire your gleaming newly restored head lights 🙂
If you have any helpful tips or further advice, or you simply want to post your before and after photos then please drop me a comment.
PS here”s a by 3M on the whole process.
EMMA JONES
This article was written and published by Emma Jones. Emma works for Trade Classics as an in-house journalist and copywriter and has many years’ experience in the classic car sector. Why not write a reply on this article below – she’d love to hear your thoughts on her thoughts!Also, don’t forget to check out the classic cars for sale here on Trade Classics.Google
Categories: Classic Car Blog, Classic Car Chat, Government Policy


